The information in this article applies to the following products:
• Prism Deploy 7.0 and above
Summary:
There may be situations that require you to move both the Prism Deploy Channel Server and the Prism Deploy Channel database from a machine to a different machine. For example, you are retiring a server and want to move your entire Prism installation to a new server.
If you are moving just your Prism Deploy Channel Server, please use the following Article instead: http://www.nbtnet.newboundary.com/supportkb/article.aspx?id=10019
If you are moving just your Prism Deploy Channel database server (MSDE or SQL), please use the following Article instead: http://www.nbtnet.newboundary.com/supportkb/article.aspx?id=10018
Notes:
- Keep in mind that there is a difference between the Prism Deploy Channel Server and the Prism Deploy Channel database server. The Prism Deploy Channel Server is the center of Prism Deploy operations. It manages communication between the Prism Deploy Console, the Prism Deploy clients and the Prism Deploy Channel database. The Prism Deploy Channel database server (MSDE or SQL) stores data about computers, groups and tasks, etc. within the Channel.
- These two components are not required to be on the same system, but this Article assumes that they are both installed on the same machine and you wish to move them both to a new machine.
- It is beyond the scope of this document to explain all the options and considerations for backing up, restoring, moving and modifying databases. Please refer to “Books Online” if you’re using SQL Server. If you’re using MSDE, please refer to this web page as a starting point: http://support.microsoft.com/default.aspx?scid=kb;en-us;325003.
· SQL based screen shots were taken of SQL Express 2008 R2
Method:
- To begin the process of moving your Prism Deploy Channel Server to another machine, you first should change all of your Clients' subscription information to point to the new server.
- From the Prism Console, choose Computers | Create Subscription File.
- Click the Settings button and then the Server tab.
- Change the name from the current Prism Server to the name of the machine that will host your moved Prism Server and click OK twice.
- Save the file as an executable in a location visible to the target machines. Ex. \\server\share
- Create a Command that installs this new Subscription File.
- Edit the new tasks properties and uncheck the "Wait for completion" box on the Command tab.
- Assign this Task to all of your machines. When the Task runs, the Client will stop polling your current Prism Server and begin to poll the machine that will host your new Prism Server.
- Repeat steps 1 trough 8 for all of your channels on this Prism Server. NOTE: Only move to step 10 when all of your machines have successfully run the Task.
- On your original Prism Deploy Channel Server, launch the Prism Deploy Setup and choose Remove, press Next >.
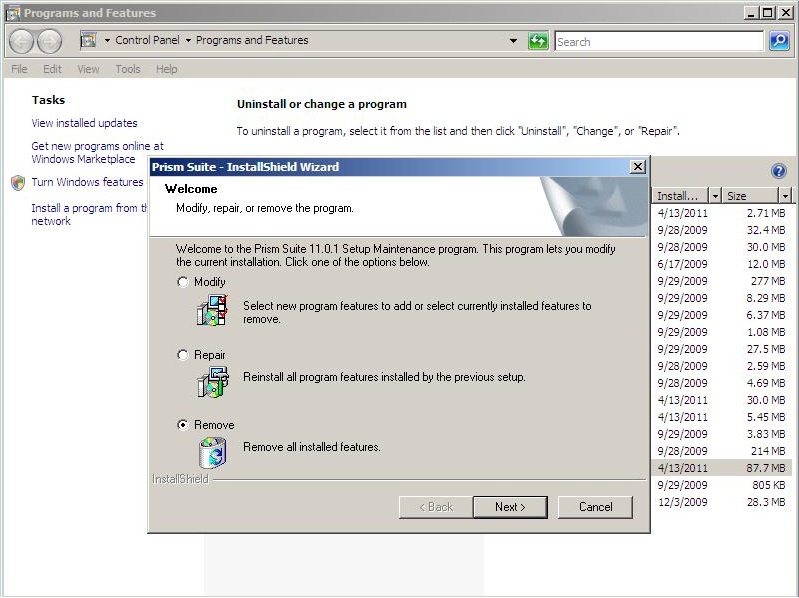
- ALTERNATLY: If you wish to leave the Prism Editor and Prism Console on this machine, choose Modify on screen from Step 11, press Next >, and then unselect the Channel Server, press Next >.

- It is necessary to complete either Step 10 or Step 11. This disconnects the Channel database within the SQL Server, thus enabling it to be used with a new Prism Deploy Channel Server.
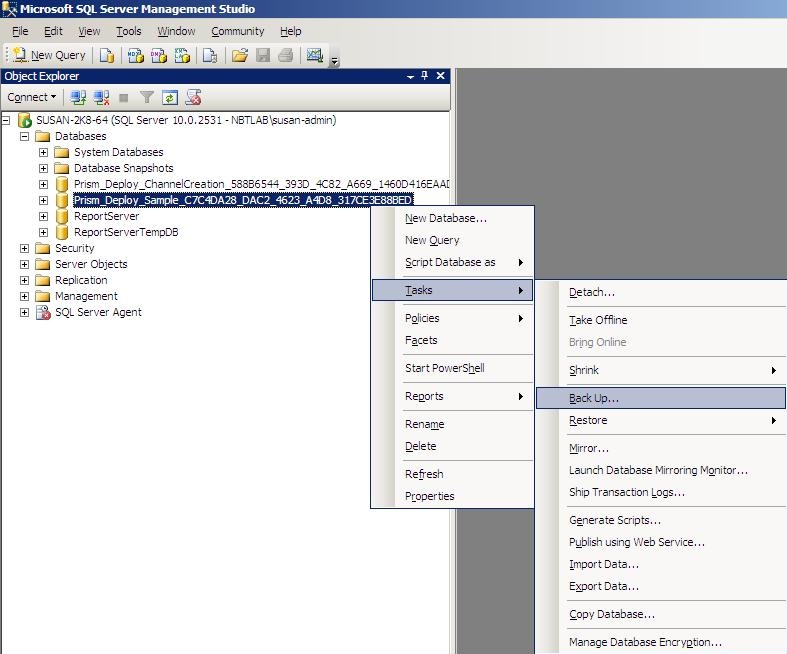
- On your SQL Server, back up your existing database(s). Prism Deploy Channel databases often use the same name as the Channel name with “_PD” appended to the end. This Article assumes the channel is named “Production” and the channel database is named “Production_PD”.
- You can use SQL Server Management Studio, 3rd party SQL management tools, or MSDE command-line options (osql.exe) to perform the backup. Our screenshots show the steps in Management Studio; the command-line options for MSDE can be seen in the Note at the bottom of this article.
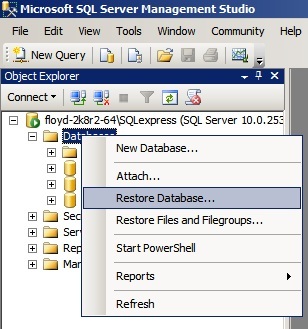
- Right-click the Database... and select Tasks, and then Backup….
- Give the backup a name and click OK. (Make sure that the location and folder structure already exist.)
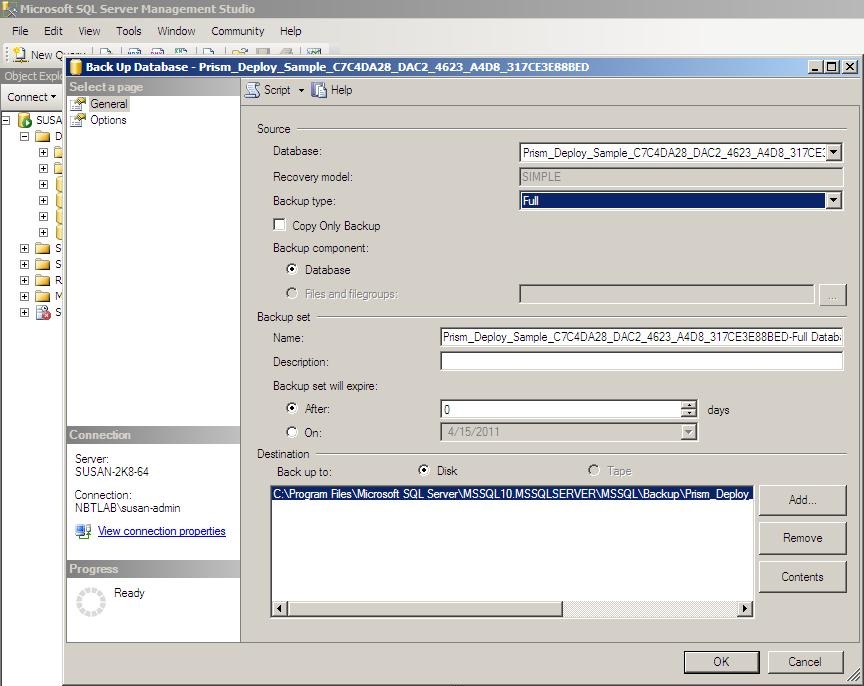
- Click OK on the screen from step 15 to start the backup.
- Repeat steps 14 through 17 for each channel that you wish to move.
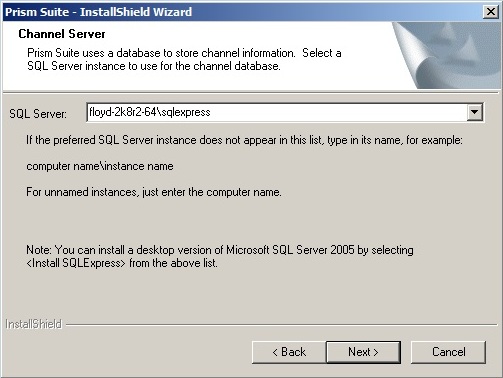
- Install the Prism Deploy Channel Server (and Administrator Console, if desired) on the new server system you plan to use.
- When configuring your Prism Deploy Channel Server, be sure to associate it with the new or existing SQL instance that is the one on your new server.
- After the Prism Deploy setup completes, move the backup file(s) that you create in step 14 through 17 to your new SQL Server (preferably into the same folder structure).
- On the new server, launch your SQL management tool to restore the database(s).
- Under “Source for restore” chose “From Device” and click the “…” button.
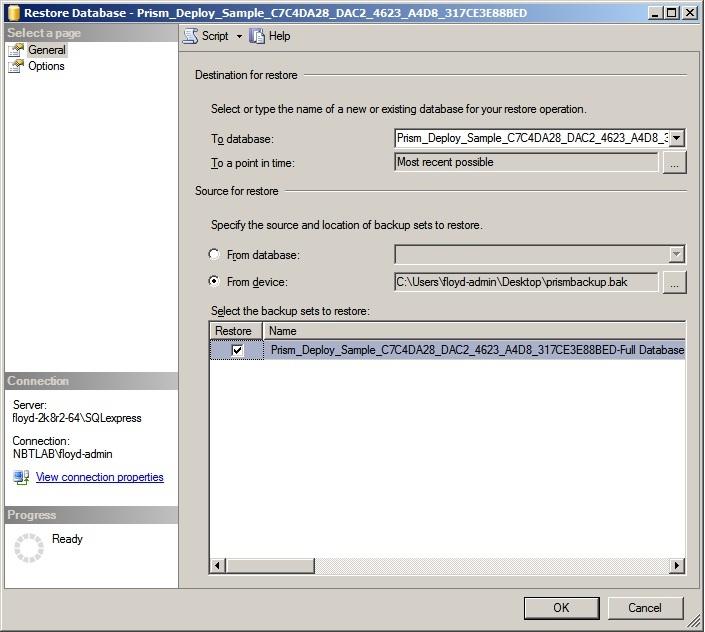
- Click the Add… button.
- Select the backup file that you created in step 21 and click OK.
- Click through two more OKs.
- After the restore completes, you will get the message:

- Repeat steps 22 through 27 for each channel that you moved.
- Right click on the Prism Deploy Channel Manager in the system tray (
 )and choose Connect Channel…
- Choose the authentication method and click Next ->.
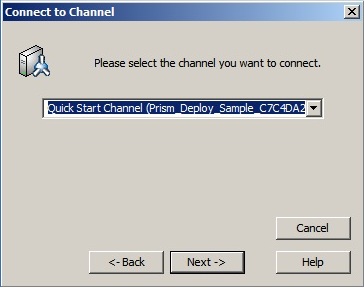
- Select the channel that you restored and click Next -> and then Finish. Repeat for each channel that you moved.
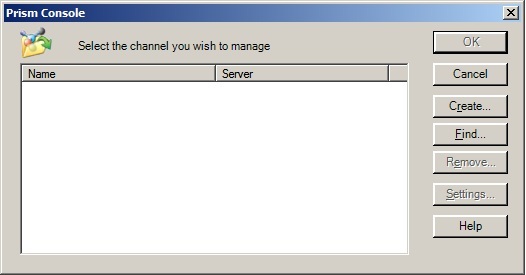
- Launch the Prism Deploy Console if the “Select a channel you wish to manage” window is not still open as a result of Step 21.
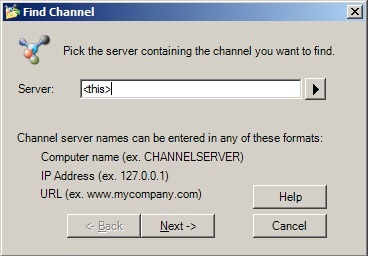
- Click the Find… button.
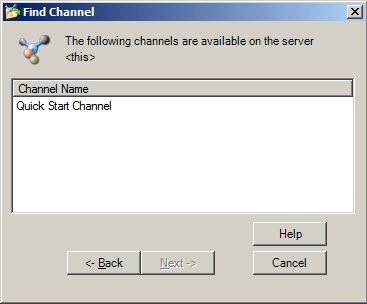
- Type in “<this>” and click Next -> to see all channels that have been connected to the local Prism Deploy Channel Server.
- Select that channel that you moved and click Finish.
- Repeat steps 34 through 36 for each channel that you moved.
NOTE: If you are using osql.exe (provided with all version of SQL) instead of Enterprise Manager, the following steps can be substituted:
Steps 15 through 18 can be substituted with the following commands:
1. osql –S %computername%\sw_deploy_server –E
2. Within osql type:
a. BACKUP DATABASE Production_PD TO DISK = 'C:\Production_PD.bak'
b. GO
Steps 23 through 28 can be substituted with the following commands:
1. osql –S %computername%\sw_deploy_server –E
2. Within osql type:
a. RESTORE DATABASE Production_PD FROM DISK = 'C:\Production_PD.bak'
b. GO
These steps assume that you are using the default MSDE instance that is created via the Prism Deploy installation. If you manually installed MSDE or SQL Server before installing Prism Deploy, please replace %computername%\sw_deploy_server with the name of the instance that you are using.